
I love chocolate and I have recently discovered I love cake – there was a phase in my teens when I was convinced cake was not my thing. I now blame the whole teenage angst for this delirious thought.
So when The Londoner decided to put together a blogger bake sale for charity, I knew I absolutely had to take part! But then, with a world of options to bake, how could I possibly choose a winner?! So, I did what I do when I can’t decide – I go by process of elimination. My flatmate and friend Sandra happens to be gluten intolerant and cannot have dairy at the moment, and since I was dragging her with me to the bake sale, I might as well bring at least one thing I knew she could eat! So, a dairy and gluten free brownie it had to be.
SO, I give you….. The Almost-Everything-but-Chocolate-free Brownie!
Inspired by Delighted Momma

Now now, I know what you’re thinking. Why in the world would I make such a brownie when I’ve got more run-of-the-mill recipies to follow? Simple. These are WAY healthier and I was even told at said bake sale that it was the best cake in the whole darn place. One guy even asked me for the recipe. AHA! no way out now.

1 1/2 cups of shredded zucchini (as shredded and small as you possibly can. I also peeled mine)
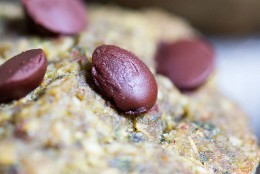
1 cup dark chocolate (either chips or buy a bar and bash it to hell)
1 cup almond butter (either buy or make your own – for recipe scroll down)
1 egg
1 tsp baking powder
1 tsp cinnamon
1 tsp vanilla extract
1 tbsp Cocoa powder (plus a bit more for decorating after)
3-4 tbsp honey (preferably raw or if you prefer you can substitute for maple syrup or sweetener)


To make
1. Preheat oven to 200ºC
2. You can either chop everything by hand or take the easy way out like I did – use a food processor and save precious minutes.
3. Add all your ingredients into a bowl, and simply mix!
4. Pour the mix into a baking dish lined with baking paper – makes your life so much easier.
5. Bake for aprox. 35-40 minutes or until you stick a toothpick and it comes out quite batter-less. I like mine quite moist on the inside.

When you’re happy with the baked level of your cake, take it out and let it cool before cutting it up. I know it’s hard to wait, but if you start cutting it up whilst its hot it will dismantle and not look as pretty. But, if it’s all for you, then go for it. When you’ve cut it up, sprinkle with the Cocoa powder – use a sieve so it’s nice and thin.
 |
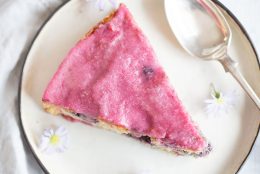
| Voilà! |
 |
| So delicious. I need to make them again soon! |

To make 1 cup of almond butter you will need
400g unsalted almonds
a food processor
patience.
1. Lay out your almonds in a baking sheet and roast in the oven for 10-12 minutes. Give them a shake halfway so they don’t burn.
2. Put all the roasted almonds in the food processor and turn on.
3. This is the patience and repetitive bit. You will keep on pressing the on/off button for maybe 15 minutes. So turn it on and after a few minutes turn it off and give the sides a scrape.
4. Keep doing step 3, you’ll see a gradual change to the consistency of the almonds – from flaky to grainy to smooth. Remember to keep stopping and scraping the sides.
5. When you have given up all hope that this bloody thing will work, it suddenly does!
6. When it’s reached that creamy peanut-butter-like consistency, it’s done! just add it to the cake or spread it on toast.
The best thing? Almond butter lasts for several weeks in the fridge! You can adapt and use any nut you like, from peanuts to cashews. Much much better than store bought and if you buy nuts in bulk, much cheaper as well!
Enjoy =)
Hi, I'm Teffy, a qualified Nutritionist and avid foodie. This blog is all about inspiring a balanced life through delicious and wholesome foods, with not a diet in sight. Healthy eating shouldn't be hard and stressful, it should be easy and fun - Working with my clients they are constantly amazed that yes, food can taste great AND be good for you!